5.4. Make master dark image
Todo
- Review the list of calibration files you made in Get organized before you get going. How many master dark images will you need to make?
Change the settings in the “DP” window to match those below.
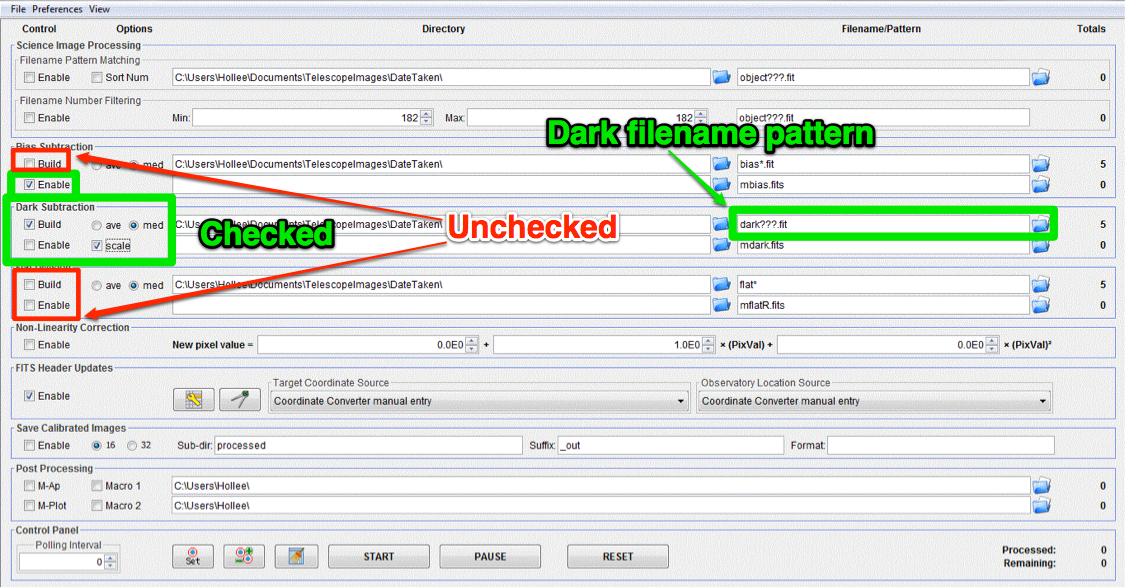
- Check only the following:
- Bias Subtraction -> Enable
- Dark Subtraction -> Build
- Dark Subtraction -> Scale
- Dark Subtraction -> med
- Note that since scale is set, it is not necessary to have darks the same length as your science images...though it’s still nice
- Find and enter file name pattern for the darks you need.
- See instructions for Make a master bias image for tips on writing file name patterns
- Review your notes from Get organized before you get going
- Make sure number in Totals next to Dark Subtraction top row is equal to number of darks you need
- Make sure number in Totals next to Bias Subtraction second row is 1
- Choose a name to save master as, e.g. “mdark” or “master_dark”. Remember that you may need to make more than one master dark, so a specific name is better than a generic name.
- Click start and watch for errors
Todo
- How many dark frames should be included by the this automated tool for each of the master darks you need to create? Note: there is no fancy way to figure this out. Look at the file names.
- Does the master dark image(s) that you produced look like a master dark should? By this point you should have some rough idea of what a master dark looks like and you should have notes on what the typical pixel value is in a dark frame. Check both of those things.
- Compare your master dark image(s) to the appropriate Reference master images to make sure they are really the same. Do that by loading both your master dark(s) and ours and using AstroImageJ to take the difference or the ratio (what would you expect for either?).